Introduction
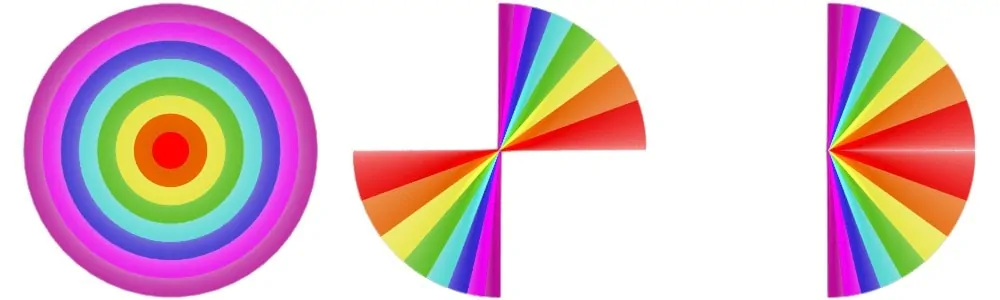
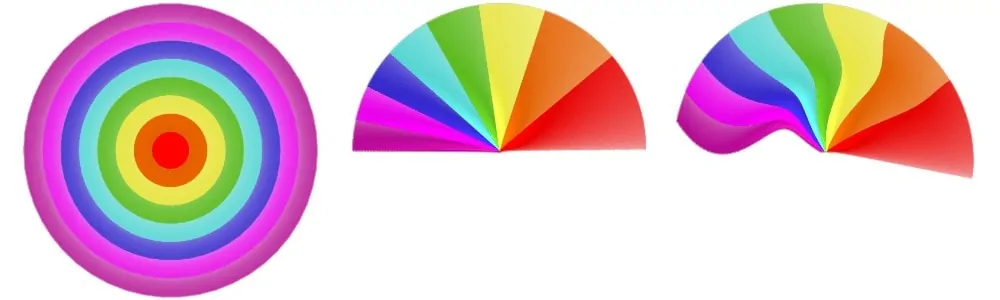
The disc variation is based on polar coordinates, where points are specified by a distance ρ and an angle θ (see polar). The basic idea is simple: it just switches ρ and θ (after scaling by π to make things work nicely). This converts wedges centered at the origin to half-rings and vice versa as shown below. The images on the left side are before and on the right side after disc is applied.

The sides of the triangles across from the center point get converted to arcs by disc because the corners are 1 unit from the origin but the middles are closer, so ρ varies from 1 to somewhat less along the sides. More importantly, the result seems sideways; the polar coordinate angle θ is normally measured from the positive x axis towards the positive y axis. In JWildfire, positive y is down so θ would be measured clockwise from the positive x axis (going right from the origin). However, disc swaps the x and y axes, so θ is instead measured counter-clockwise from the positive y axis (going down from the origin).
Using Disc
If the math seems confusing, don’t worry; understanding how disc works is not needed to actually use it. The important thing to note is that disc creates, well, discs (filled-in circles, though they may have holes or be incomplete), so it can be used to fill in circular holes. For example, take this spherical gasket (from spherical ).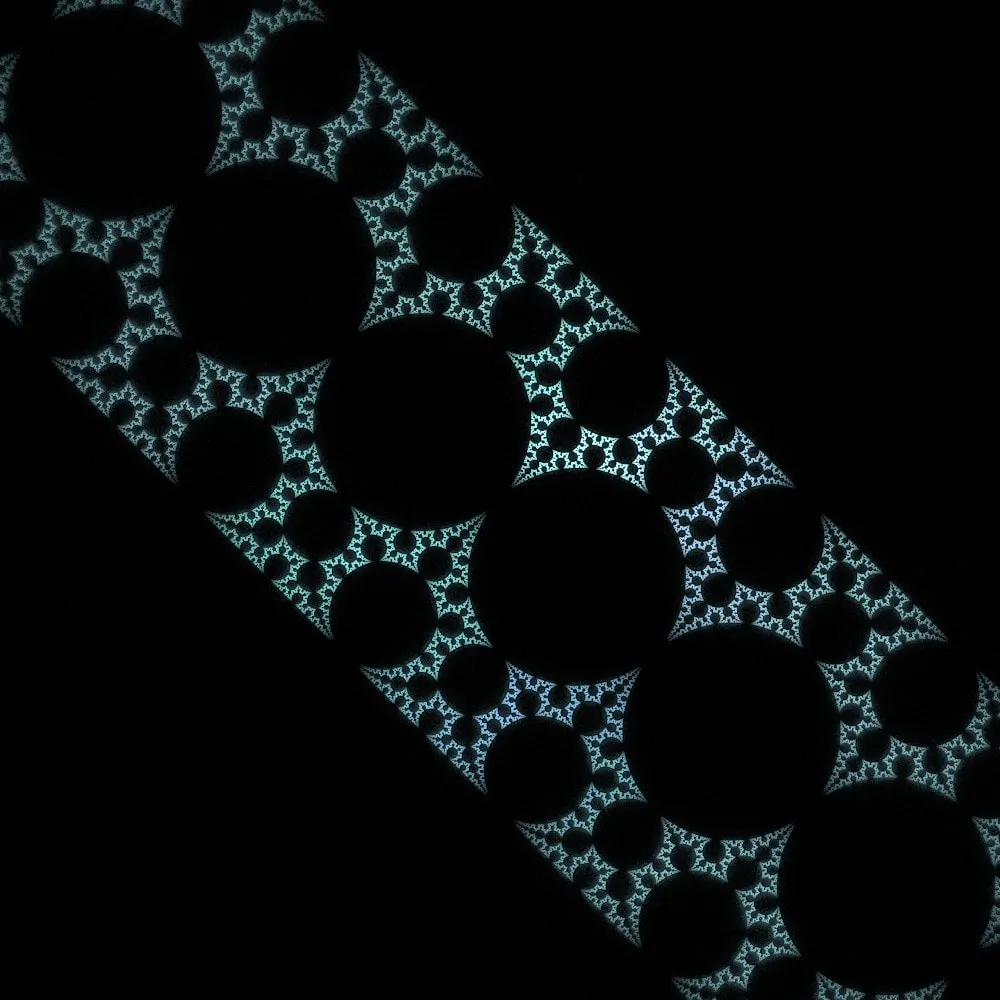
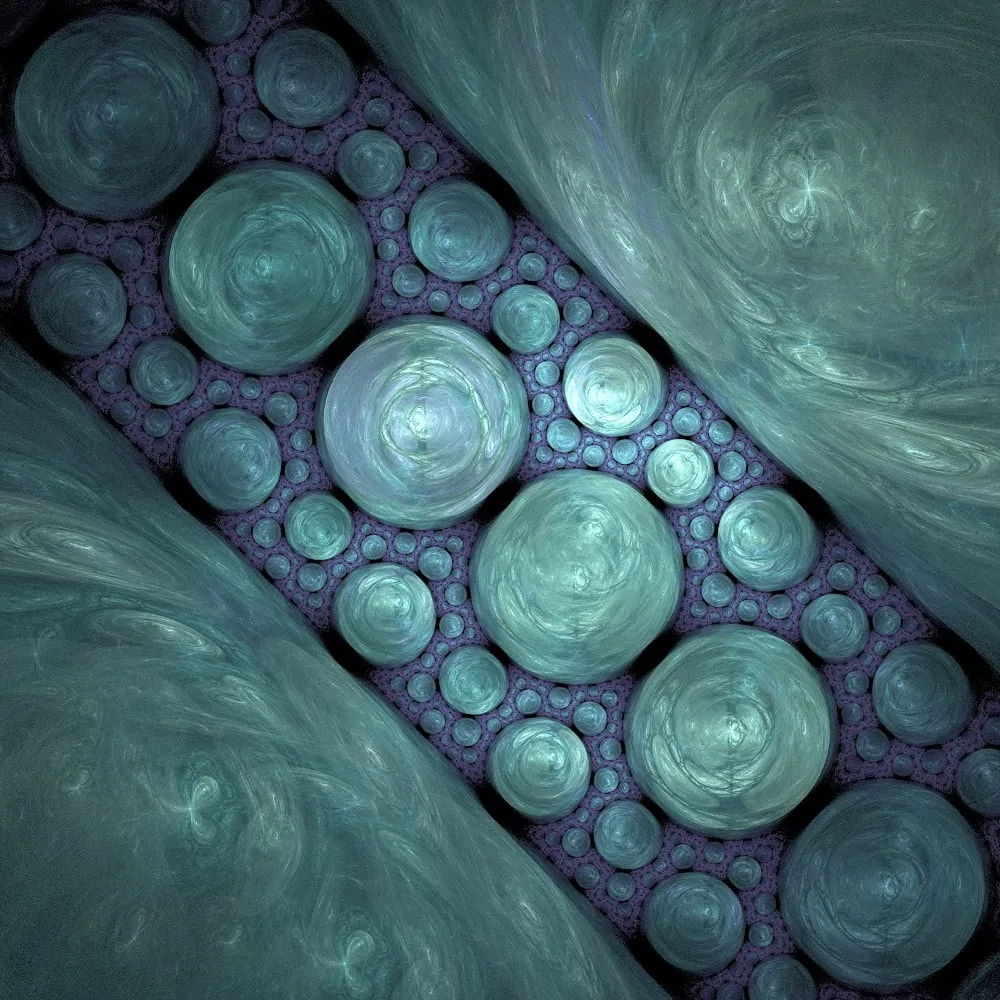
If we add a new transform with disc, set the amount to 0.45 to fit the largest holes, move the post transform up and left to position it over one of the holes, and fiddle with the coloring we get this:
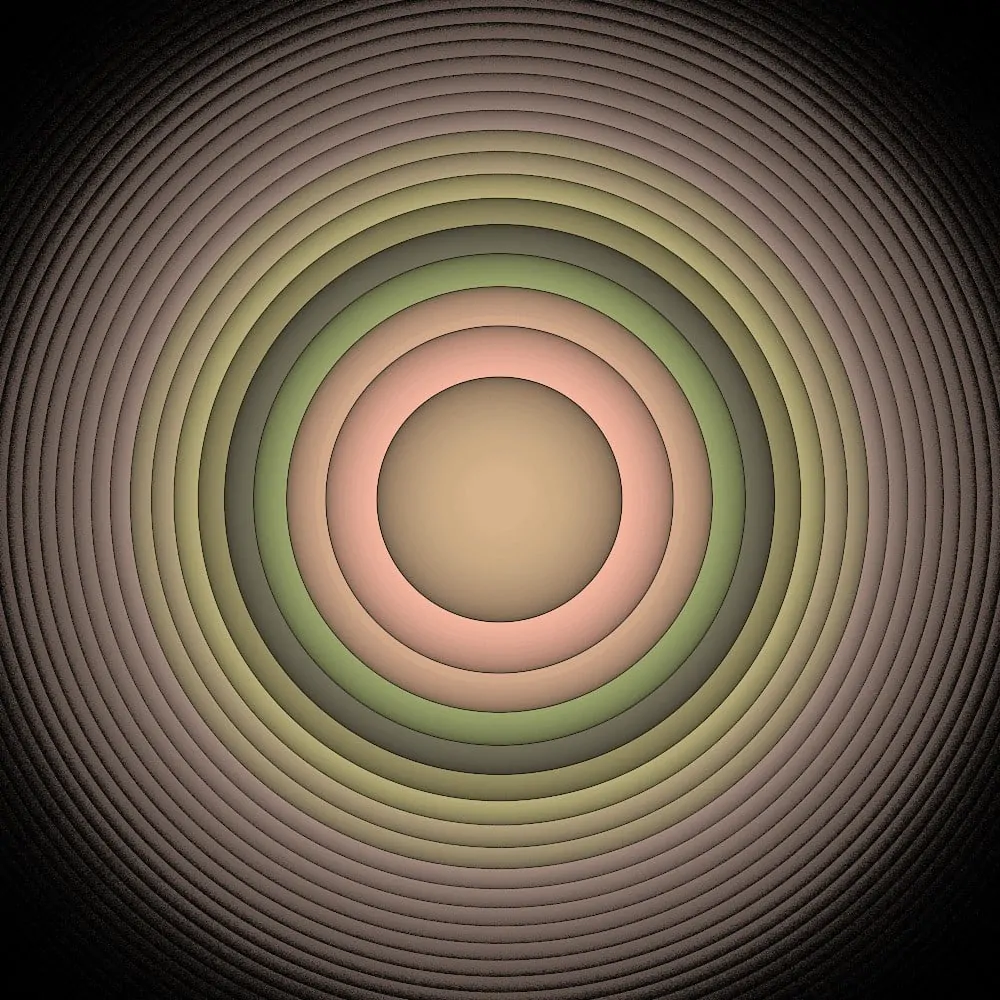
Some variations create holes by design, so work nicely with disc. For example, hole2 shifts the plane outward from the center, leaving a hole. The shape of the hole is controlled with the shape parameter; values of 0 and 1 create circular holes. To make a hole2-disc flame, start with a blank flame, add a transform, set the weight to 1, change the variation to hole2, set parameter a to 0, and parameter shape to 1. Nothing shows yet since hole2 has nothing to work with. Let’s take a short detour and see how hole2 works: add a second transform, change the variation to sineblur, and change the Color to 1. The blur creates the disc at the center, and each iteration of hole2 creates a ring. Select the hole2 transform and try different values for the shape parameter to see what shapes it can create. Here is shape 1:
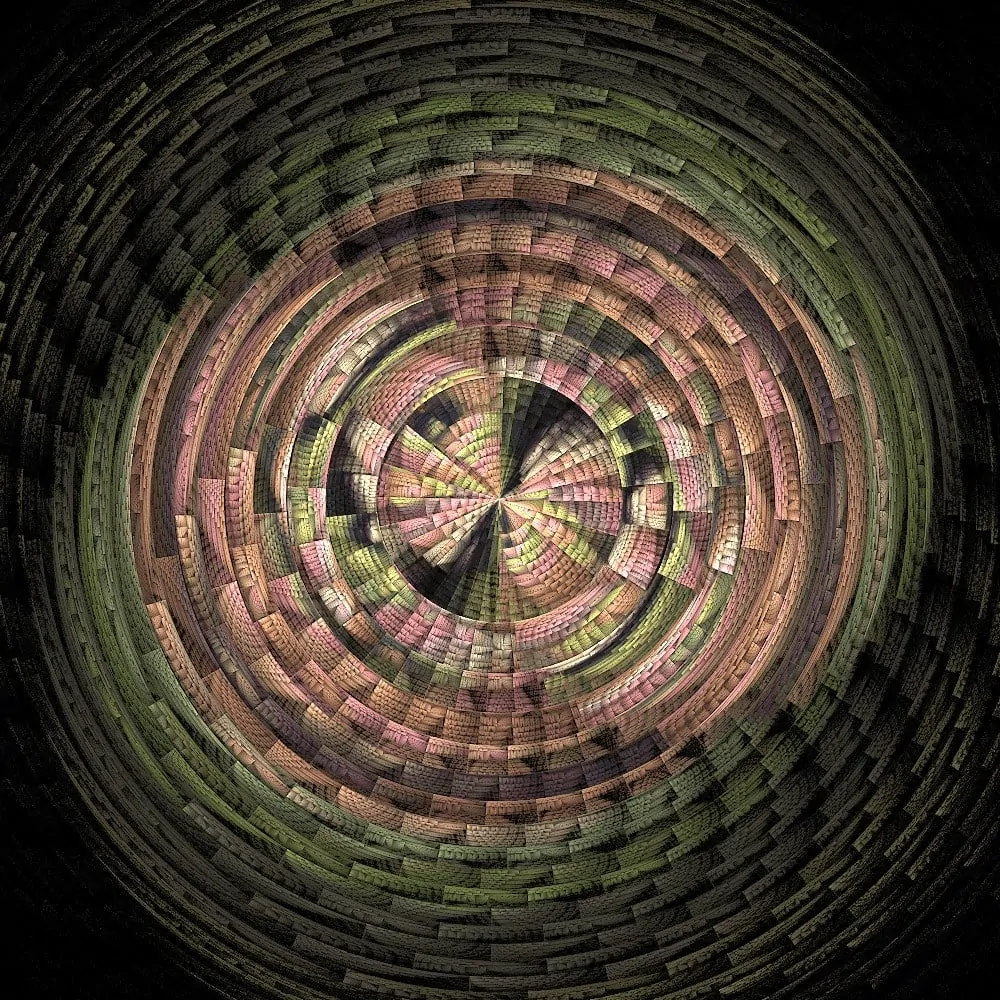
When you are done playing, set shape to 1, then select transform 2 and change the variation to disc. Shrink the triangle to 1/3 to 1/4 its original size. Disc converts the rings from hole2 into wedges; as we shrink the triangle for the disc transform, we pack more rings into the same space, creating more wedges. Now, select the hole2 transform and rotate it (either way is fine). This turns the rings so the wedges don’t line up. Rotating just a bit creates spirals as the successive rings are offset only a bit from each other. Rotating further makes abstract blocks as the correlation between the rings becomes less apparent, and create patterns in the rings. Here is an example:
Setting the hole2 shape parameter to 0 also works, but the rings are wider and further apart, so the disc triangle needs to be smaller. Even then, the patterns are generally more subtle. Reducing the hole2 transform weight can also help; since the rings are wider, hole2 doesn’t need to be iterated as long.
Another variation that creates a hole in the center is julian, particularly with a negative power. Since julian makes a single ring rather than tiling concentric rings, the process for using it with disc is different. Start with a blank flame, add a transform, change the variation to julian, and set the power to a large negative number, like -40. By itself, julian just makes a circle. Add a second transform, set the weight to 3, change the variation to disc, and set the color to 1. Now slowly shrink the disc transform triangle and a pattern of squares in rings will start to appear. Continue shrinking the triangle just until the rings stop overlapping and the two wedges at the top barely touch. Shrinking it too far will create spaces, which we want to avoid (at least for now). This will depend on the julian power. Finally, rotate the disc transform to form the julian-disc pattern.
A few extra steps will help to polish the result. First, the julian creates a halo around the disc, which you may like or may not. To get rid of it, go to the julian transform color tab and set the draw mode to hidden. Fiddle with the disc transform weight to get a nice balance; 3 was just a starting point. Increase the color speed of the disc transform to better distribute the colors, especially if the weight is high. Decreasing the color speed of the julian transform can help as well.
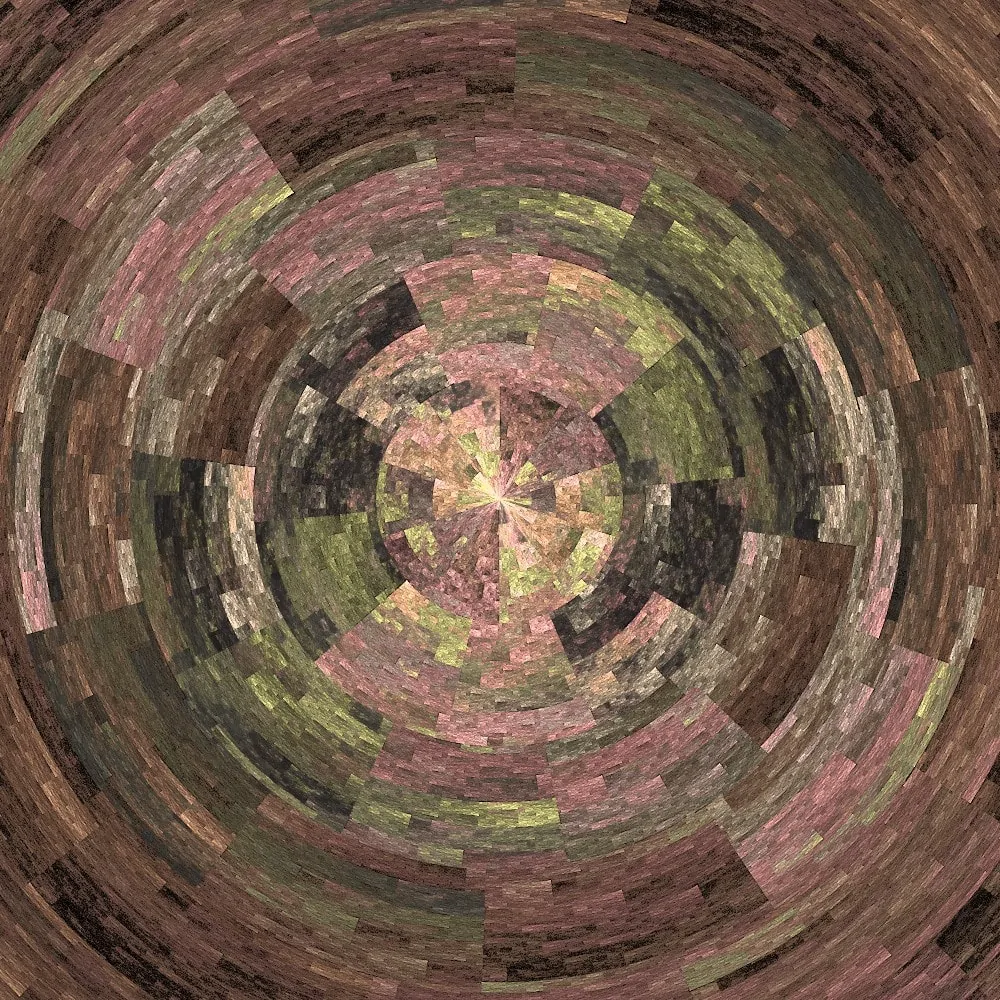
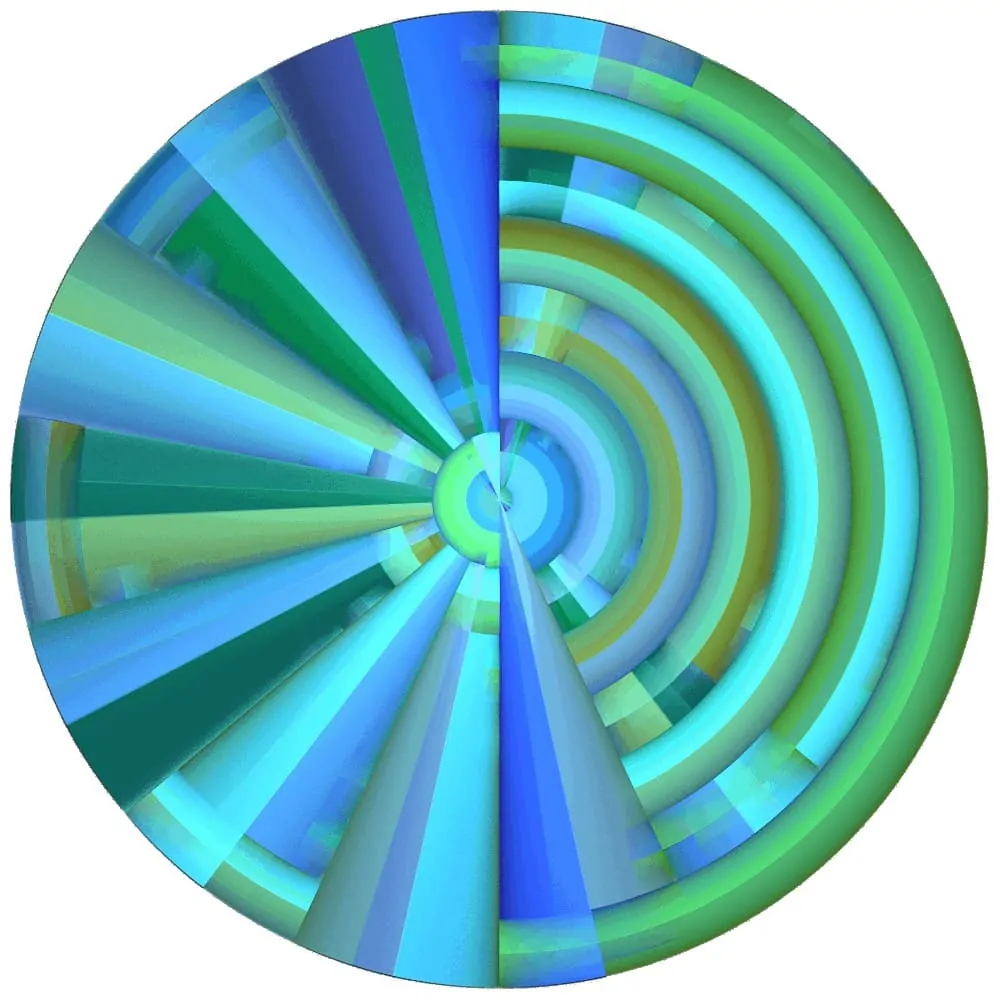
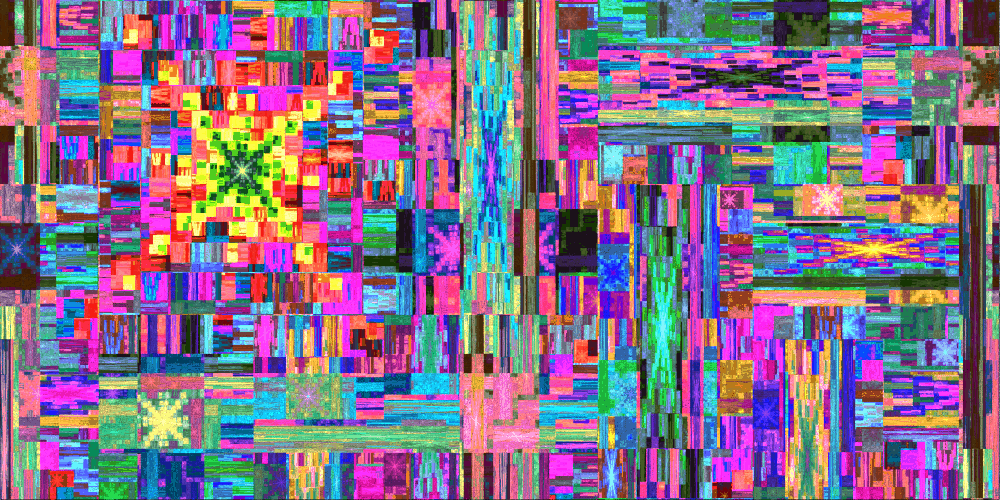
Disc can also be used as the basis of a flame. Start with a blank flame, add a transform, set it’s weight to 5, and change the variation to disc. Rotate the triangle to the left 155°. Add a second transform, rotate the triangle to the left 90°, change the variation to blur, and set the amount to 0.07. On the Color tab with the blur transform selected, change the Color to 1, the Speed to -1, and the Draw mode to HIDDEN. Select the disc transform and increase the speed to bring out the colors; the best value to use depends on the gradient; 0.85 looks nice here (using the built-in gradient 2u0017t.jpg).
We see the combination of rings and wedges typical for disc-based flames. There are lots of ways to tweak this, but be aware that small changes can have significant results. It can be helpful to enable Fine Edit mode by clicking the button above the flame preview. Rotating the disc transform will change the pattern; adjust the amount of the blur variation to avoid gaps or distracting overlaps. Moving the disc transform slightly will introduce waves and swirls, as shown here.
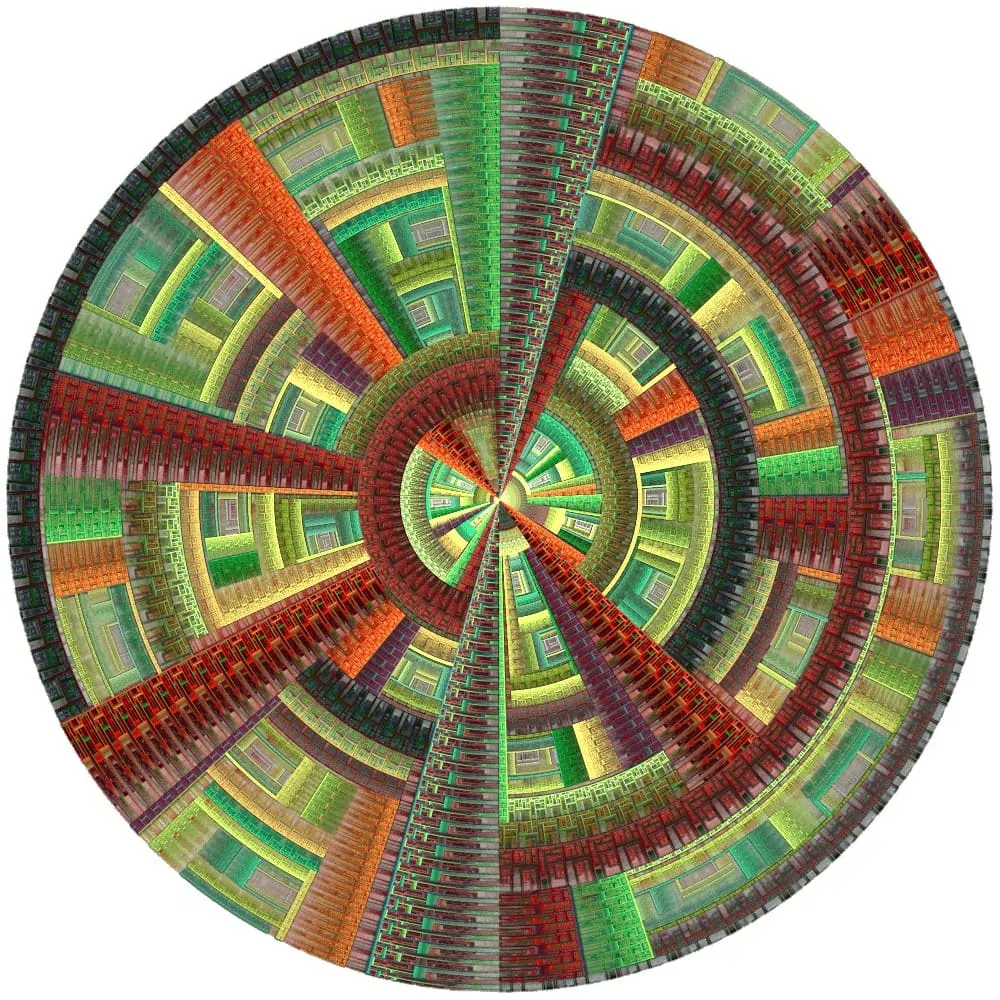
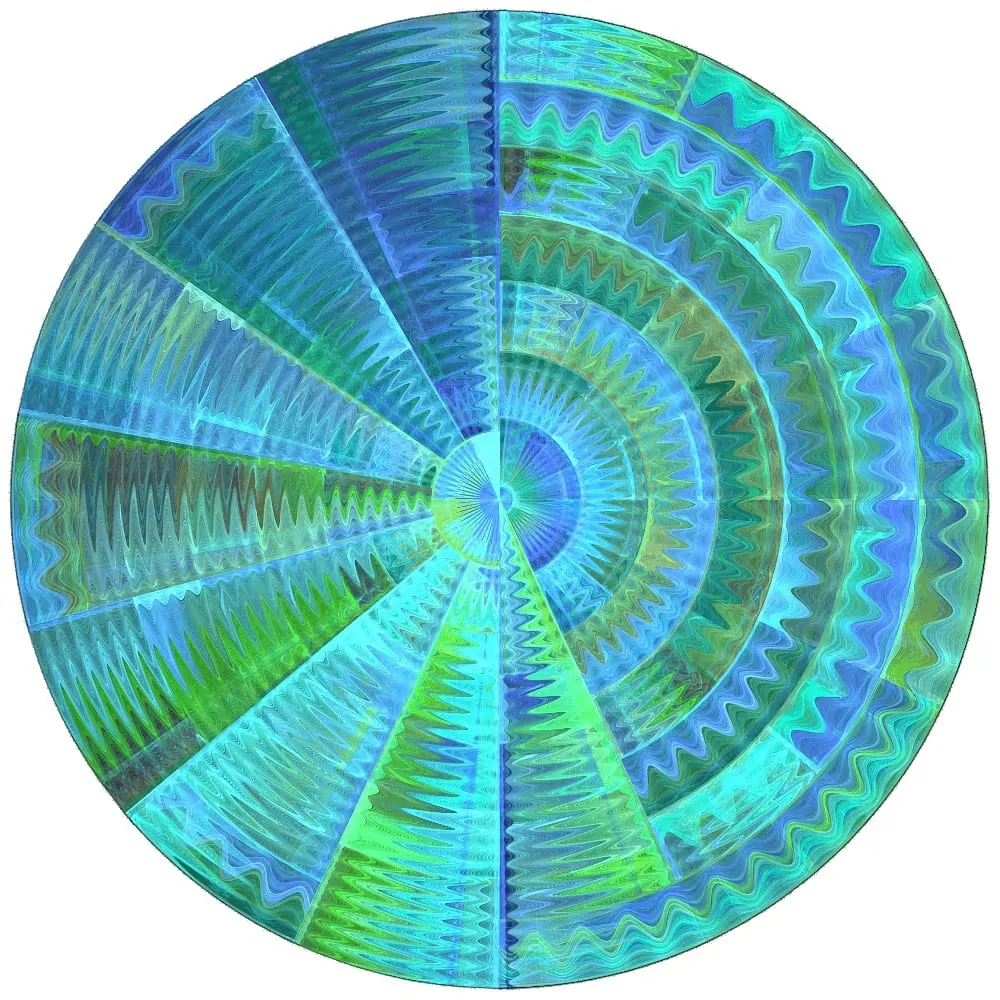
Changing blur to another variation will make new textures. It’s interesting that blur, a circle with a bright center, produces a flat disc flame, while circleblur, an evenly colored circle, gives a 3D appearance (it is not really 3D; it is 2D shaded to look 3D).
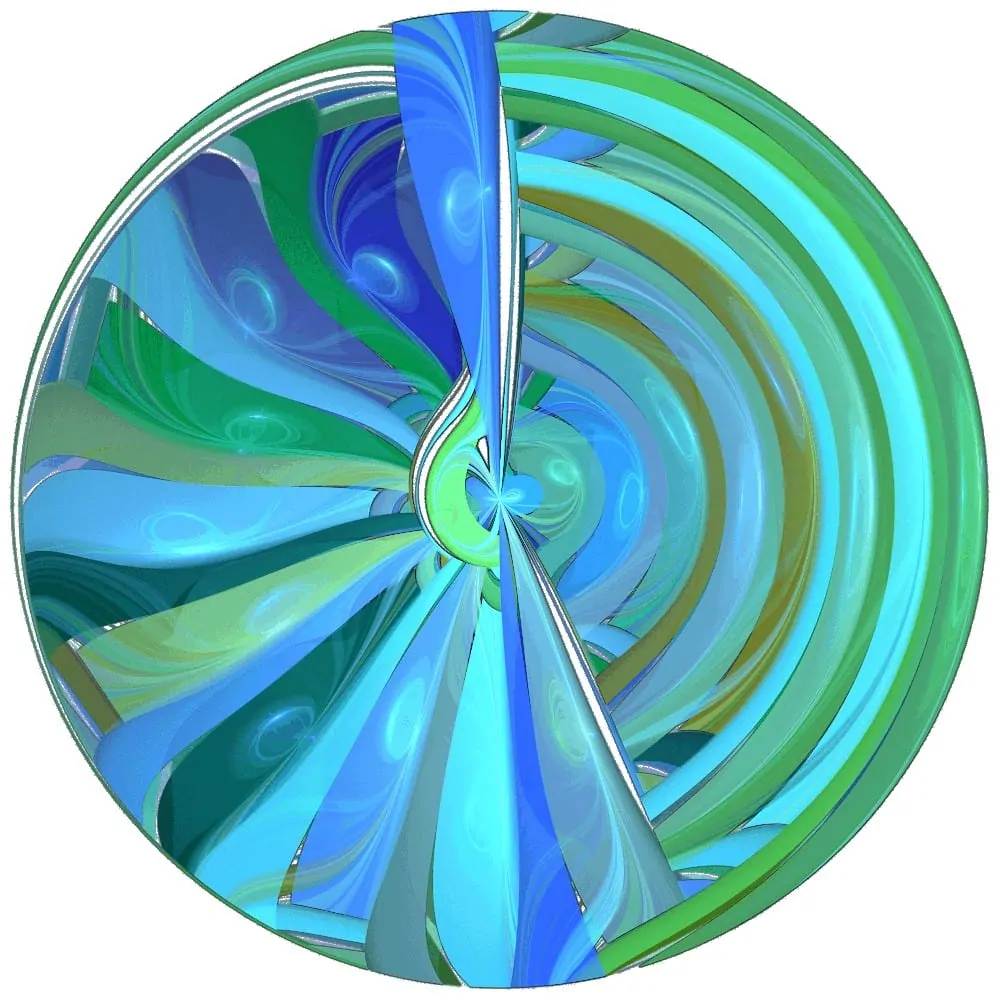
Lots of variations work with disc and create different textures. Using a color speed of -1 makes colors more vibrant when using blur variations, but should be adjusted when using normal variations. The best setting depends on the gradient, so experiment. Here the variation on the second transform is changed to blob with parameters set to make the bumps line up; the color speed is set to -0.8.
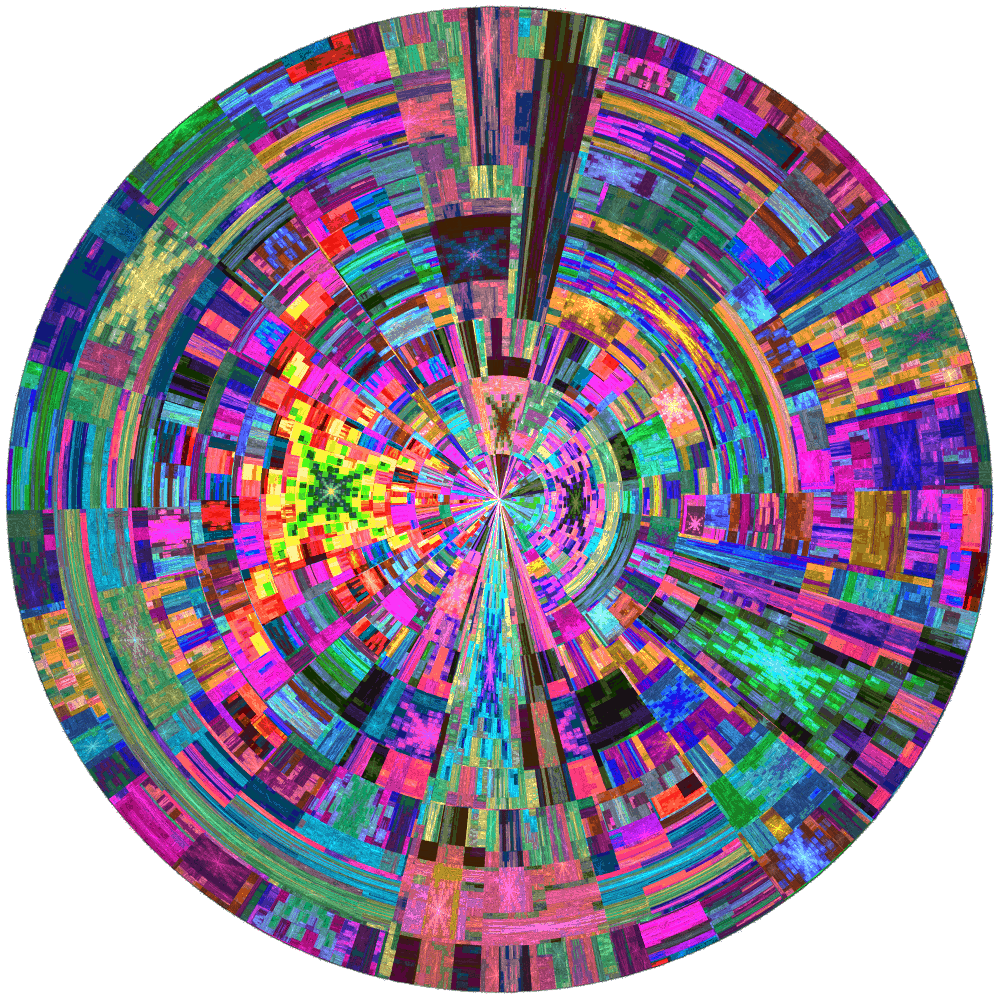
Another interesting combination is disc linked to two wedges. I haven’t seen a tutorial for this, just some handed-down flames, but the original idea is credited to Travis Williams (aka Platinus). First, pick an integer c between 1 and 4, and a number a between 0.05 and 0.5 (values outside these ranges work mathematically, but it’s harder to make them into a nice flame). Create a blank flame, add a transform, change the variation to disc, and set the color speed to 0.8 (to start; adjust this later). With transform 1 selected, add a linked transform (click the “L” button next to Add), change the variation to wedge, set count to c and angle to a. With transform 2 selected, click Dupl to duplicate the transform, use a calculator to compute 2×π/c-a, and set angle to that value (adding a instead of subtracting also works and produces a slightly different result). In the Affine tab, click Post TF (make sure it is highlighted), compute 180/c, enter that value into the angle field, and click Rotate left; click Post TF again to unselect it. In the Color tab, change the color type to DIFFUSION, the color and color speed to 1 and -0.8 (to start; adjust these later). Select transform 2 and increase the weight until the flame is filled in. The smaller c and a are, the larger this value needs to be. Now, select transform 1 (with disc) and rotate it to change the pattern. Rotate the other transforms and adjust the coloring as well.
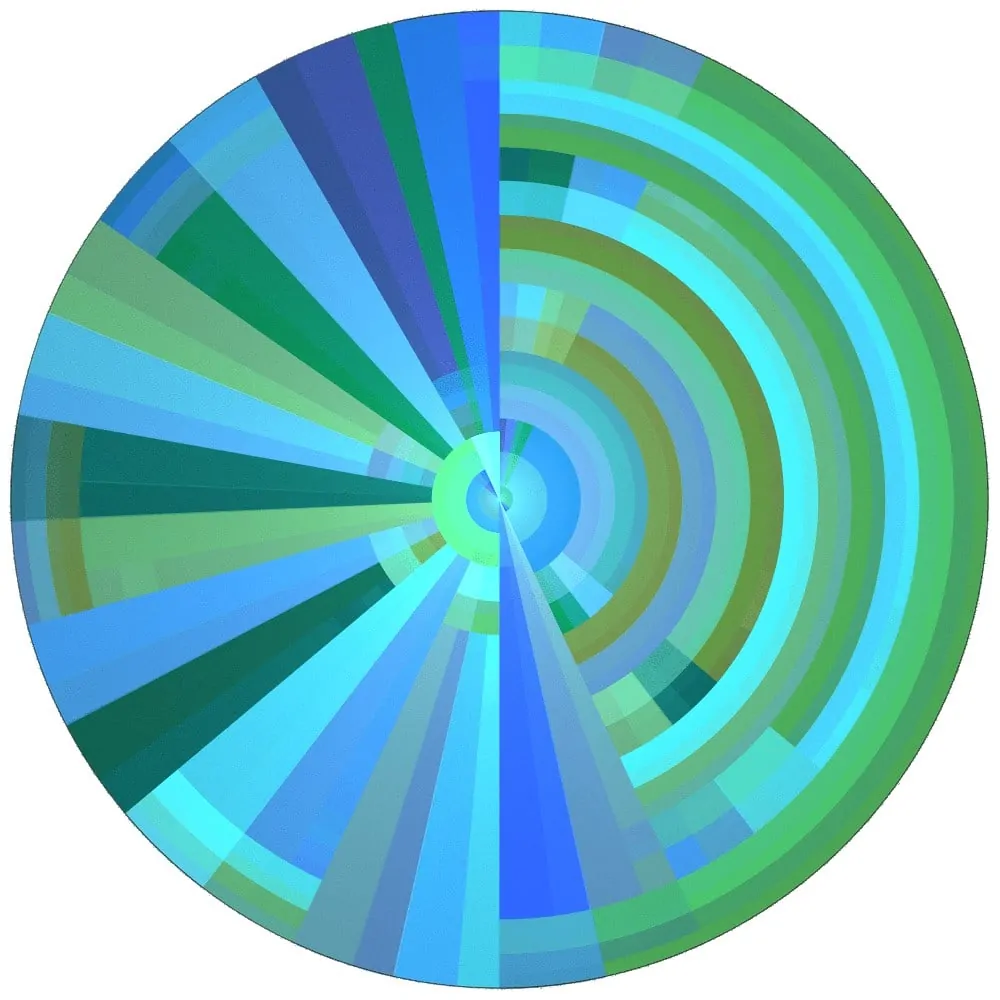
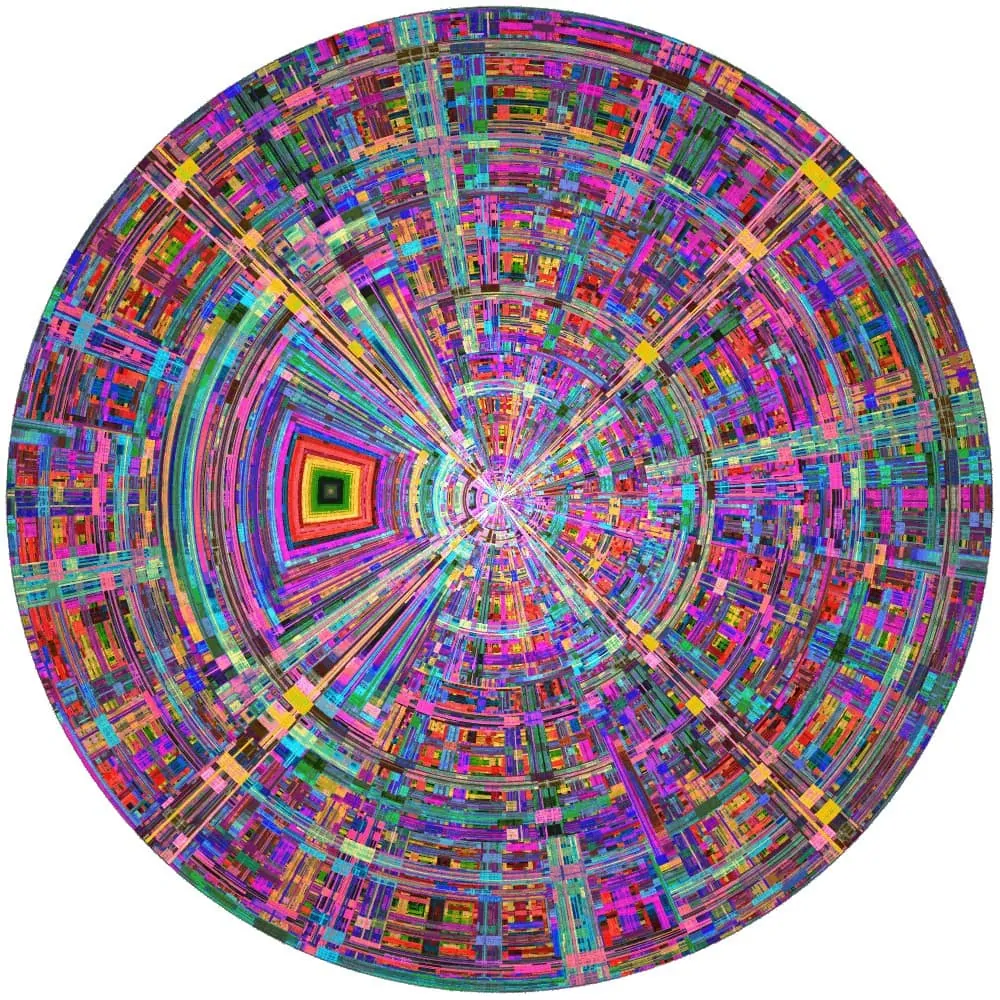
Here are some examples. The first uses c=2 and a=0.5, and the second uses c=4 and a=0.1.
Rather than starting from scratch, wedges may be added to an existing disc-based flame. Use the same process, except that instead of creating a blank flame and adding a disc transform, select the transform with disc in the existing flame. Also omit the coloring steps to use the existing flame colors. (Brad Stefanov demonstrates this in his Hole/Disc video linked in the Resource section below.)
There are a couple of ways to turn the circular disc result into a square. The classic way is to add a final transform with polar, which maps rings to horizontal rectangles and wedges to vertical ones. Rotate the pre-affine triangle to shift the result. Enlarge the pre-affine triangle to stretch the result vertically (enlarging by 200% will result in a square).
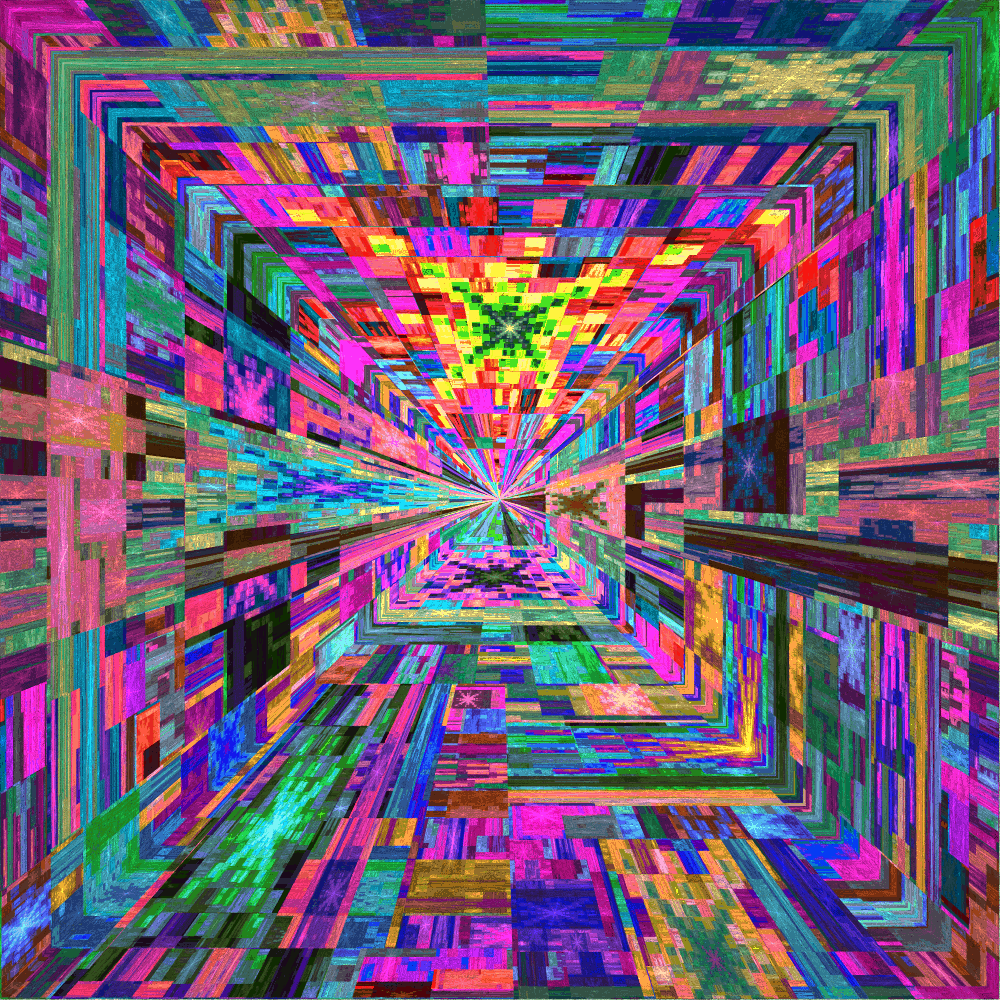
The panorama1 and panorama2 variations have a similar effect. A different way is to use squarize, which maps rings to squares but only slightly deforms wedges, creating a square tunnel effect. Rotating the pre-affine triangle will rotate the result within the square (this was done below).
Using ngon with circle=1, corners=1, power=0, and sides=4 produces the same result, but the parameters can be tweaked to give different effects. In particular, changing power effectively zooms in or out, which can be very useful. Some other final transform variations to try are modulus (set x and y to 0.71), sinusoidal, erf, cylinder, and cylinder2. These aren’t perfect, but may be useful for some flames.
Related Variations
Edisc is conceptually similar to disc, except it swaps the elliptic coordinates μ and ν instead of the polar coordinates ρ and θ, and scales them to fit into the unit circle. So the result is a disc, but it works very differently. Without delving into the math, it very roughly maps points close to the origin to the right side of the circle and points far away to the left side. Thus to fill in the entire edisc, the flame needs points far from the origin, using something like an infinite tiling or spherical.
We saw above that hole2 makes a circular tiling, so we can make it work with edisc. Create a flame with two transforms, one with variation hole2 with parameter a set to 0 and shape set to 0 or 1, and one with variation edisc. Enlarge the hole2 transform by about 150%, rotate it, and increase its weight. Shrink the edisc transform by about 150%, rotate it, and move it around.
Idisc and wdisc are closely related; they were designed to prevent the overlaps common in disc. This is done by taking the reciprocal of ρ before swapping it with θ. Rings are still converted to wedges and vice versa, but concentric rings of constant size are converted to thinner and thinner wedges, as shown in the images below. On the left is the original concentric rings, in the middle is how idisc transforms them, and on the right is how wdisc transforms them. The difference is that wdisc reflects the bottom half vertically so that points inside the unit circle map to points on the right side of the disc and points outside the unit circle (none exist in the example) map to points on the left side of the disc.
Like edisc, filling in the entire disc requires the flame to have points far from the origin. For example, use it with hole2 using the same technique as with edisc. Another way to work with idisc and wdisc is to add post_mirror_wf as a second variation on the same transform; with the default parameters, it reflects horizontally, filling in the whole disc. Note that this makes idisc and wdisc work the same. This combination can be used in the same ways as disc, though the results will be quite different. Here is a julian-idisc/post_mirror.
Fdisc also takes the reciprocal of ρ before swapping, but it scales by 2π instead of π so that points inside the unit circle map to the top half of the disc and points outside the unit circle map to the bottom half. The JWildfire version of fdisc also has some parameters that can be tweaked. In the following image, fdisc with the default parameters is shown in the middle, and some of the parameters are changed for the one on the right.
Use it like idisc and wdisc, except for post_mirror_wf change xaxis to 0 and yaxis to 1 to reflect the fdisc vertically. Then try tweaking the parameters to see what effect they have. Here is fdisc/post_mirror linked to two wedges.
A few others: Disc2, while based on disc, uses the sum of x and y instead of the distance of the point (x,y) from the origin as ρ, which makes it work very differently. Disc3 is disc with parameters added. The default values make it just like disc, so to use it, make a disc-based flame and change disc to disc3, then fiddle with the parameters as part of tweaking the flame. Disc3d is a three dimensional version of disc; it works just like disc in two dimensions, but also modifies z so can be used to make 3D flames.
Credits
Michael Faber created the edisc, fdisc, idisc, and wdisc variations.
Gregg Helt (CozyG) added some parameters to fdisc when he ported it to JWildfire.
Brad Stefanov added some parameters to disc to create disc3. He also invented the hole2-disc style.
Iowna Fido (Fiery-Fire) invented the julian-disc style.
Travis Williams (Platinus) is credited for the disc-wedge style. I haven’t found a tutorial for that, but learned it from some handed-down flames which I used to understand the underlying math and generalize the technique.
Resources
Most of these are for Apophysis, but the concepts apply to JWildfire. The first is for JWildfire and demonstrates several of the techniques described here; I recommend it.
Beginner’s Introduction to the Disc Variation by Stan Ragets (f–l–A–r-k)
Disc-Julian Tutorial by Iowna Fido (Fiery-Fire)
Flipped Disc Tutorial by Joel Faber
Disc Spiral Tutorial by Michael Faber
Spherical-Disc Tutorial by Silver Clarke (heavenriver)


Rick, thank you for your tutorials and other tools. Speeds up learning, making it even more fun!
Cheers!