Introduction
Thanks to Tracy Colello for the information on how to go about this, I did find a tool which will hopefully remove a couple of steps needed to complete the task. You may want to install the Panorama script on the site which prepares your fractals for a panorama, or you may want to experiment without. The best images are those that line up vertically and horizontally (seamless) there are ways of creating these, which would be the subject of another tutorial, or you can use the script mentioned which should do that for you.
Firstly you’ll need to create your JWildfire image, and make sure it has an image ratio of 2:1 ie twice as wide as it is tall. I use 2000×1000 px, and I’ll show you how to create this as a render setting first.
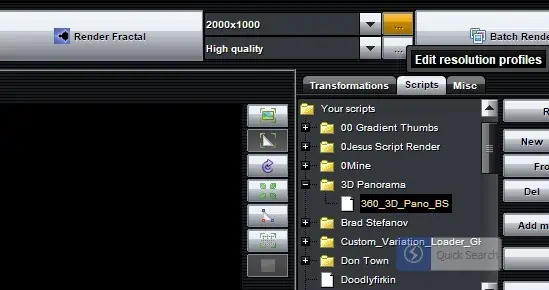
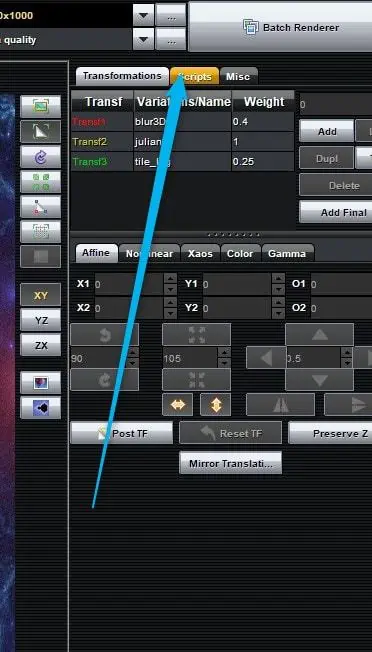
Step 1) Load or create your fractal, then click the ellipsis (3 dots next to the image size)
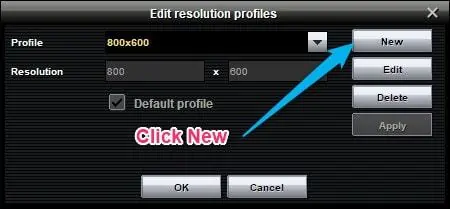
Step 2 Click New
Step 3 Enter Resolution size
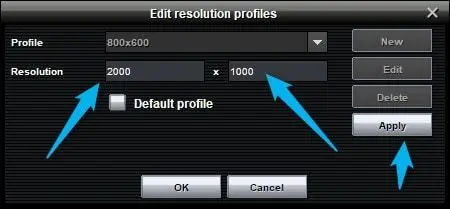
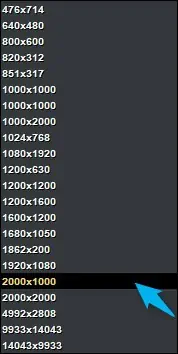
Step 4 Choose your new image size settings
Step 5 (optional) Create your Panorama version of your fractal
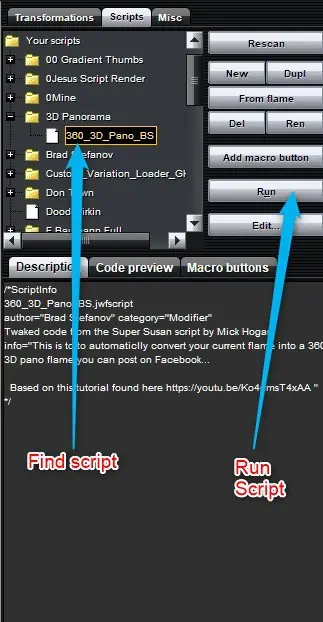
Assuming you followed the instructions at the beginning of the tutorial to install the 360 Pano script, you can run this here to generate a panorama ready version.
6 Find and Run the script
7) Save your fractal
Once the script is run, it will rejig your fractal to be suitable for a panorama, you will need to render the fractal it creates and save it somewhere with a memorable name, maybe prefix it with panorama or something like that.
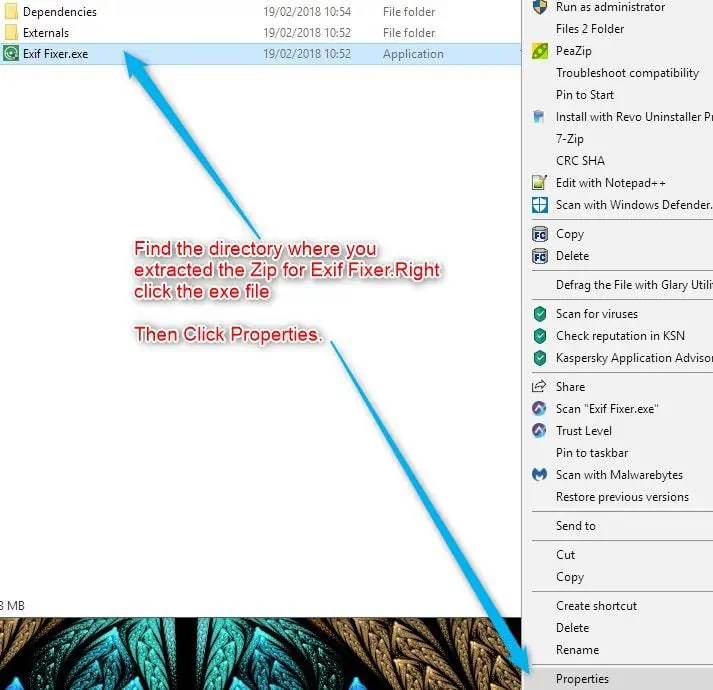
8) Download / Install and Run the Exif Fixer tool (free)
You can get the tool from the Exif Fixer website, download it here install it, and remember where you installed it. As we have to change a setting on the program file. We have to find the Exif Fixer exe file, right click it, and choose properties (have to set it to run in Administrator mode all the time). We can choose Run as Administrator, but you’ll have to do that every time, so the way we will do it now, will make sure it runs in Administrator mode ALL the time. Once you click Properties…
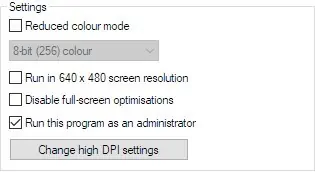
9) Click Compatibility, then choose Run As Administrator.
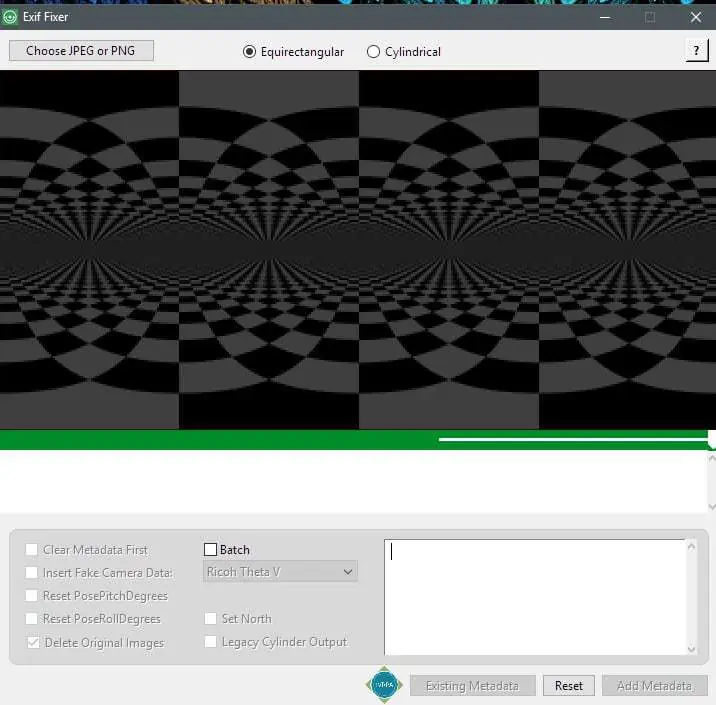
10) Almost there! Before you run the Exif Fixer program, it’s probably a good idea to make a copy of your fractal, in case something goes wrong. Run the Exif Fixer
11) Click “Choose JPG or PNG” and load your fractal
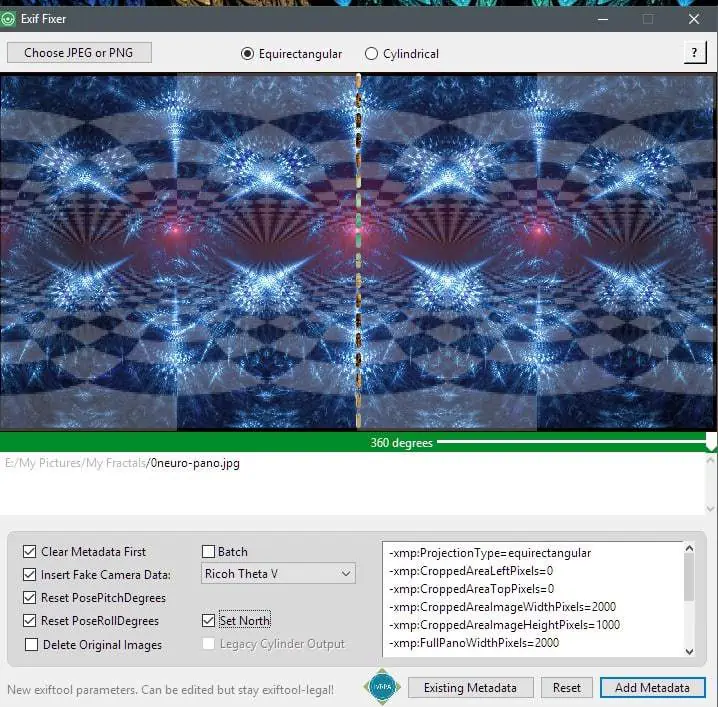
12 Make sure all the tick boxes are checked as on the screenshot, then click “Add metadata”
13) That’s it. your fractal is now ready to be uploaded to Facebook as a panorama. It’s a complicated procedure to begin with, but once you have the script installed already, and the image size as well as Exif Fixer installed a lot of these steps you won’t need second time around.
Sorry if you’ve a macintosh, I don’t know of software that will alter exif info for free (maybe photoshop). But you need to set the camera mode to Ricoh Theta V in the metadata if you are using the mac. The exif Fixer above does that already..


Many Thanks for This – Wise Site Diety 😉