Description
Although “linear” seems a strange name for a non-linear variation, it’s a really important one. The name makes sense in the context that it means not to use a non-linear variation, just the affine mappings that are part of every transform. When a new transform is created, it is assigned a variation of linear3D with an amount of 1, which just maps the input to the output without any change. The new transform also has affine mappings that make no changes, making the new transform neutral, ready for us to set it to our needs.
A quick side note for the curious: the mathematical terms “linear” and “affine” mean almost the same thing and informally are sometimes treated as synonyms. Both linear and affine mappings map straight lines to straight lines. So three points that are in a line before the mapping will be in a line after the mapping. The difference is that linear mappings map the origin (0,0) to itself while affine mappings don’t have this restriction.
Linear3D maps all three coordinates, x, y, and z. In contrast, linear is a 2D variation and only maps x and y; z will be set to 0 if no other variation on the transform maps or sets z. Unless Preserve Z is set, in which case linear3D and linear behave identically. For convenience, we’ll use the term linear here to refer to either linear or linear3D unless the distinction is important. For 2D flames, which don’t use the z coordinate, linear3D and linear can be used interchangeably; most people use linear3D since that is what JWildfire uses by default. For 3D flames, linear3D is generally used so that z is preserved. But it is important to understand that if z is 0, linear3D will not change it to something else; we need to either use other variations that set z or use the YZ or ZX edit planes to give a flame three dimensionality.
Linear has a lot of different uses in creating flames. We can’t cover all possibilities here; just some common ones. We can think of linear as a variation that makes a copy of the plane or 3D space, modified by the associated affine transform, which usually shrinks, rotates, or moves it. We’ll see how this works as we look at ways linear is often used.
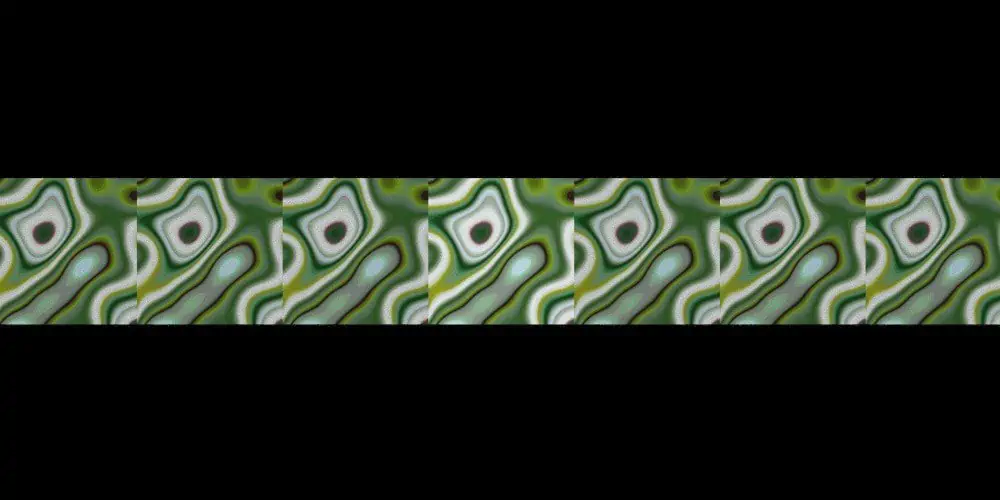
We’ll start with tiling. Tiling (also called tesselation) is a huge subject, and we’ll barely scratch the surface here and cover only one of several ways to do rectangular tiling. Imagine a tiled floor, where square tiles are positioned in a grid pattern; that’s what we’ll be creating in JWildfire.
We start with a blank flame and add a transform with a blur variation to form the initial tile; we’ll use dc_perlin with the default parameters. This is just to let us see what we are doing; we’ll replace it with something more interesting later. We then add two transforms with linear3D, and move the pre-affine triangle for one of them 1 unit right, and the other 1 unit left. The result is a horizontal line of tiles; let’s pause a moment and consider how this works. Transform 1 ignores its inputs so just results in the center tile. If the next iteration chooses transform 2, the center tile is moved one unit to the right, resulting in the tile to the right of center. Iterating transform 2 two and three times in a row results in the tiles two and three to the right of center. The tiles to the left of the center one are obtained by iterating transform 3 in a similar manner. Unlike a tiled floor which ends at the walls, this tiling goes on forever.
Name: linear3D
Type: 3D
Name: linear
Type: 2D
To get this result, we’ve made three optimizations:
- To preserve the colors of the initial tile, we set the color speed on the linear3D transforms to 1.
- Tiles further from the center are only obtained when one of the linear3D transforms is repeated many times in a row. To make this more likely to happen, we increased their weights to 10. This value is somewhat arbitrary, and can be changed later, but 10 is a good starting value.
- Transforms 2 and 3 cancel each other out. For example, if one iteration chooses transform 3 and the next chooses transform 2, the net effect is nothing. To make the process more efficient, we adjust the xaos, changing “2 to 3” and “3 to 2” to 0 to prevent direction reversals.
Xaos is another big and sometimes complex subject. Our use here is relatively simple; we just use the values 0 and 1 where 1 indicates what transforms may be chosen after a particular one and 0 indicates transforms that may not be chosen.
Linear tilings can be useful; for example, the Circular Flame Tutorial by pillemaster starts with a linear tiling, then bends it into a ring using unpolar and feeds that into other variations to make interesting flames. (See also the JWildfire adaptation of it.)
But our goal here is rectangular tiling, which is done simply by tiling the horizontal linear tiling vertically. We add two more transforms with linear3D and move the pre-affine triangle of one of them 1 unit up and the other 1 unit down. We make similar optimizations: set the color speed to 1, increase the weights (though only to 5), and adjust the Xaos, setting “4 to 5” and “5 to 4” to 0 to prevent them from cancelling.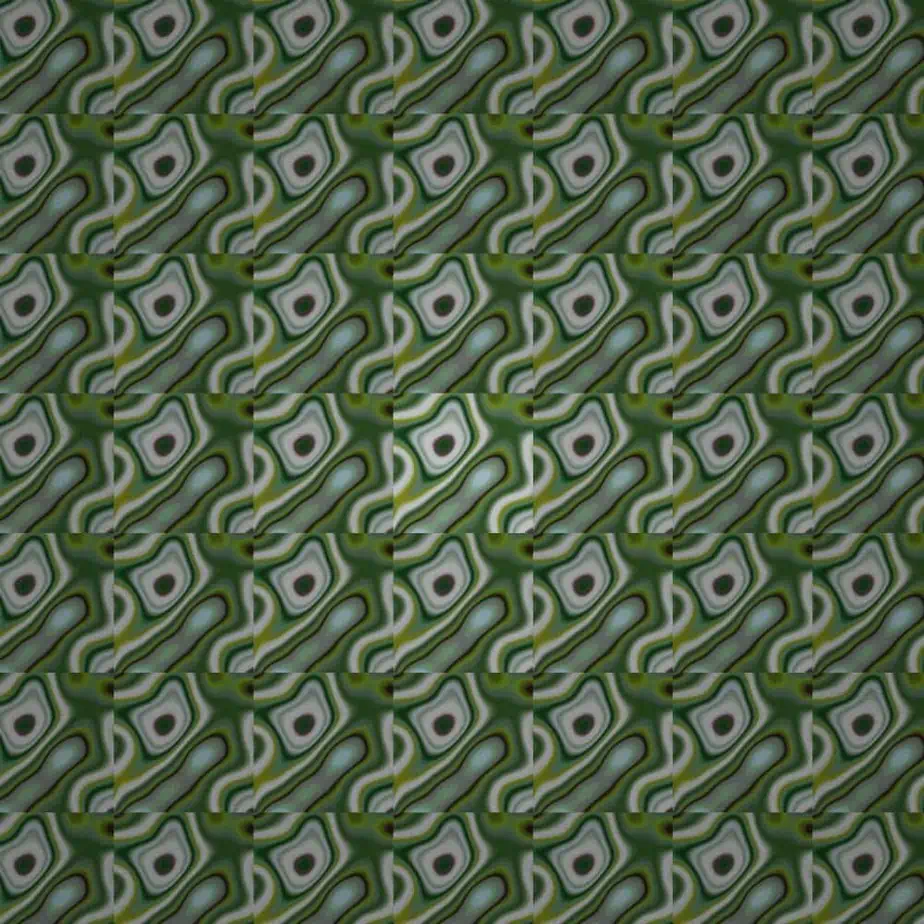
This is a basic rectangular tiling of a dc_perlin pattern. It is often helpful to add borders to the tiles. So we add another transform and change the variation to cylinder or cylinder_apo with a very small amount of 0.025 to make them very narrow. To move it to the edge of the tile, set Post TF and move the triangle up and right 0.5. In the color tab, set the speed to -1 and the color to a nice color (depends on the gradient). To reduce the emphasis on the border, reduce the weight to 0.2. Then duplicate the transform and (with Post TF still set) rotate it 90°.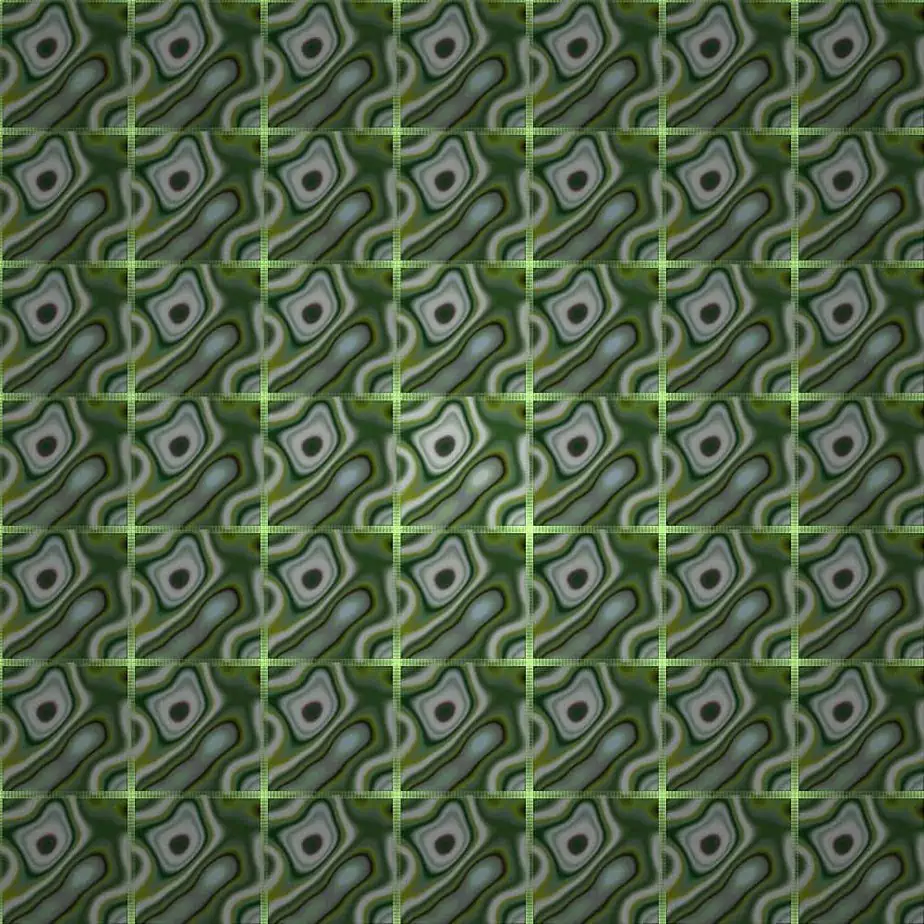
With the framework in place, we now change the dc_perlin to whatever we want to tile. We’ll use dc_dmodulus here since it fills the square. But that isn’t necessary; there is no rule prohibiting leaving blank space or going past the border! The result may not look nice, but we can still try.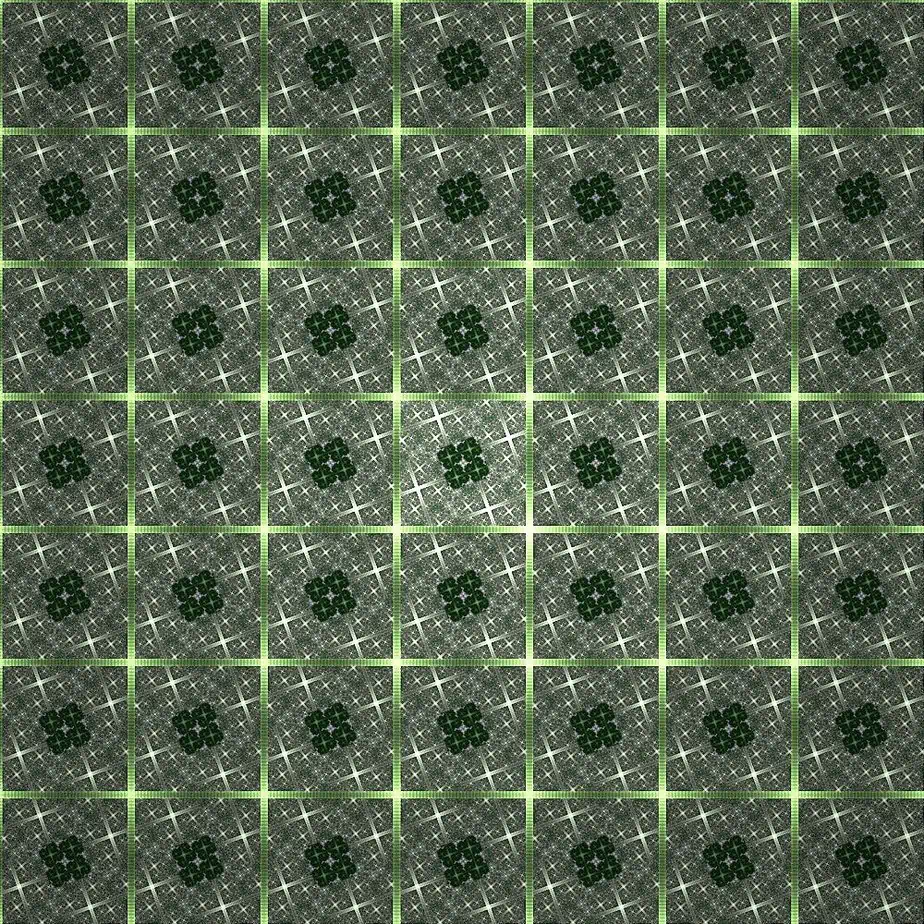
Finally, we add a final transform to distort the grid into a more interesting shape. Here, we use rings2.
A very different type of tesselation is rep-tiles, where a shape is divided into smaller copies of itself. A simple example is dividing a right triangle into two smaller right triangles, like this: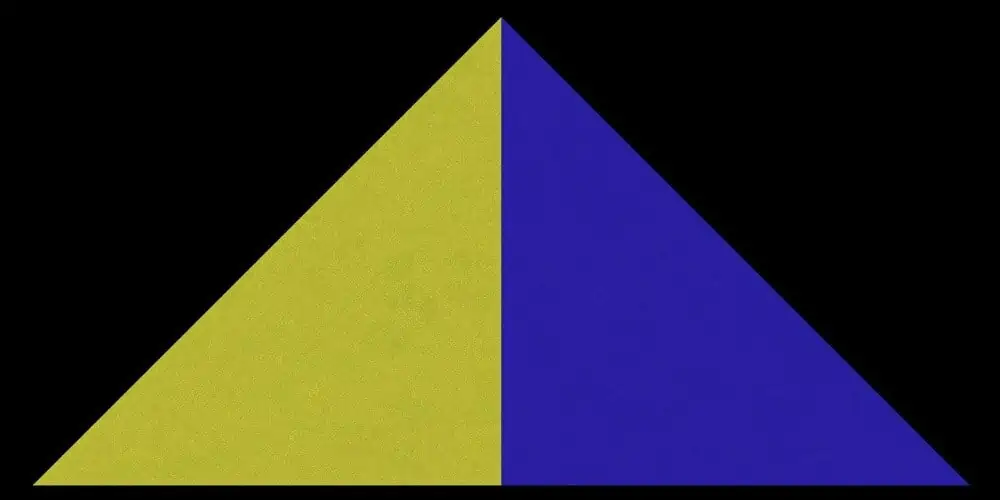
This was made in JWildfire using two transforms with only linear. Both were scaled down by  by entering 141.42136 in the scaling field and clicking Shrink triangle. One was rotated right 135° and moved left 1 and the other was rotated left 135° and moved right 1. The color speeds for both transforms was set to -1 to give each a solid color.
If we instead rotate both triangles 45° right, we get a fractal known as the twindragon.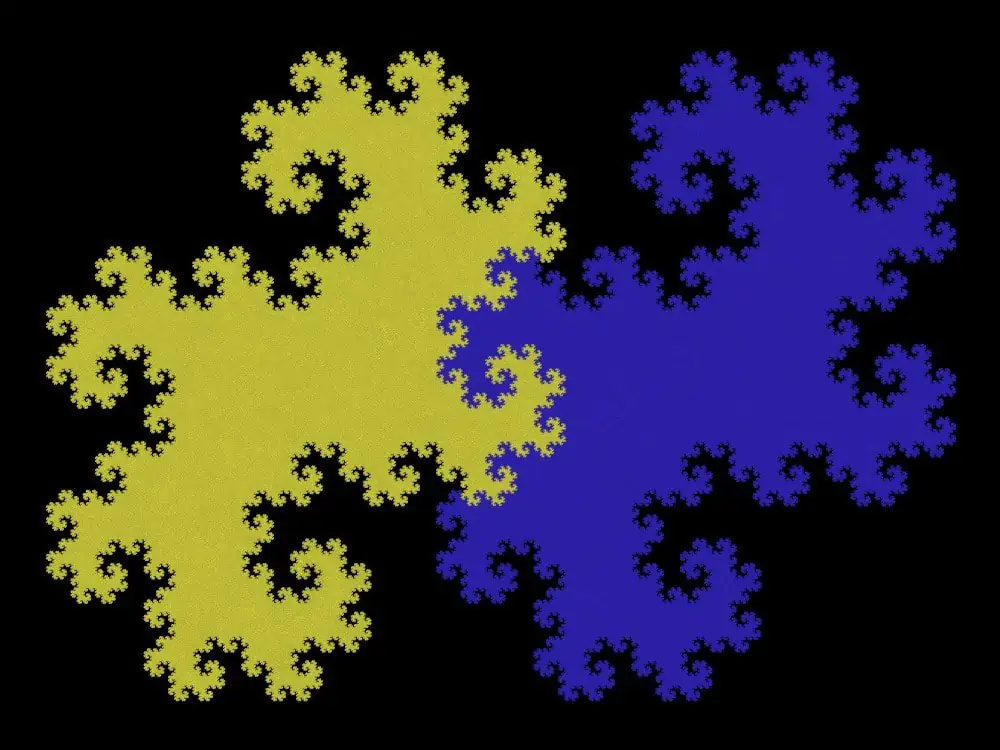
The images above show only the first division to see how the transforms are set up. But each of the smaller copies are split into yet smaller copies, and the process continues forever. Here are the whole twindragon fractal and the first two iterations.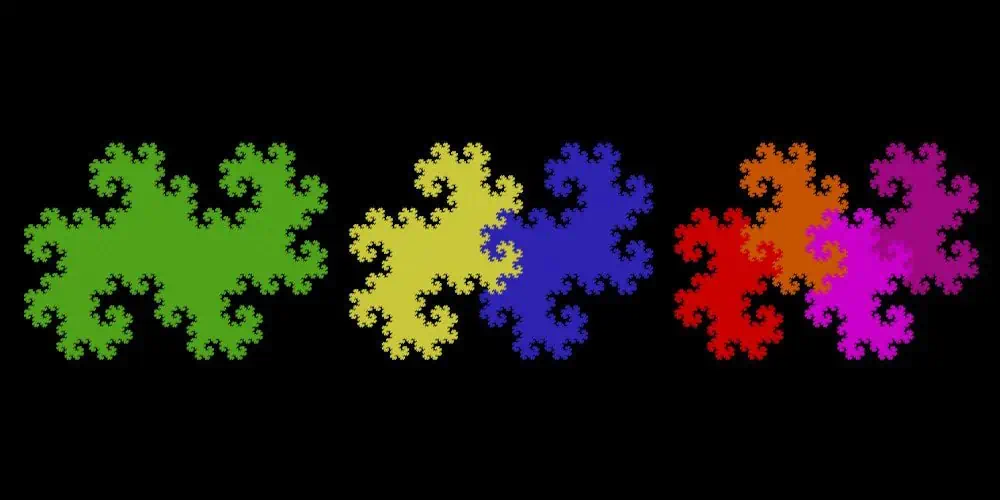
If we set the color speed to 0, the gradient colors will spread through the fractal forming a quilt-like pattern. Here is the rep-tile triangle from above colored as a quilt. The effect depends a lot on the gradient, and specifically on the frequency of its colors. This one has a high frequency: a lot of thin stripes of colors. To increase the frequency of a gradient, use the Frequency item in the Modify gradient tab. (That isn’t needed with this gradient, but it can be useful with lower frequency ones.)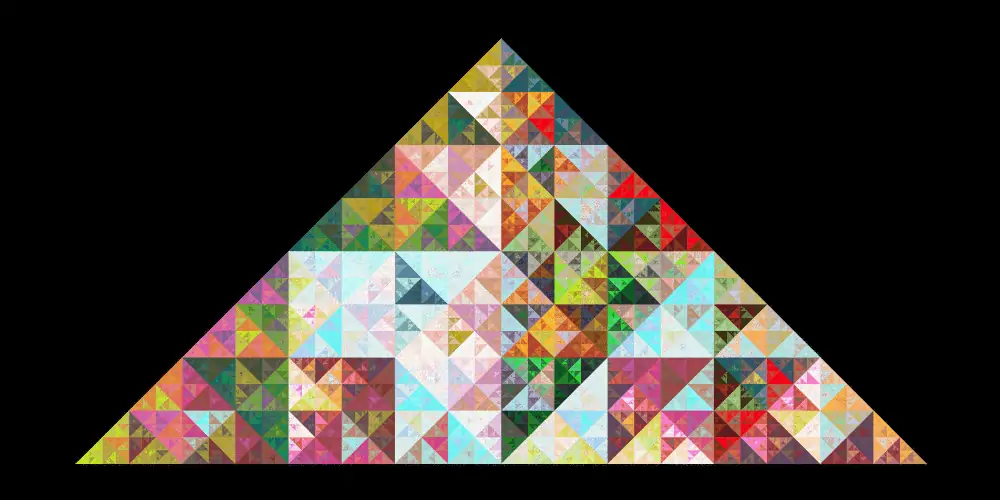
There is certainly a lot more that can be done with tiling; see the Resources section at the end for links to some tutorials. Be we go on to other uses of linear. Next is the spiral. Like linear tiling, we use linear to repeat an initial motif, but this time we shrink and rotate it to form a spiral.
We’ll start with a blank flame, add a new transform, and change the variation to starblur with an amount of 0.5 to be able to see the spiral structure. Then we add another transform, increase the weight to 5, and leave the variation as linear3D. We move the triangle for this transform right and down, shrink it slightly , and rotate it right. To color the spiral, we set the color to 1 and the speed to 0.9. The result is a spiral made of stars.
That’s the basic structure. Now we change the first variation to something else. Here we use juliaq.
It’s fine just like this, but as usual we can change the shape with a final transform. Here we use coth.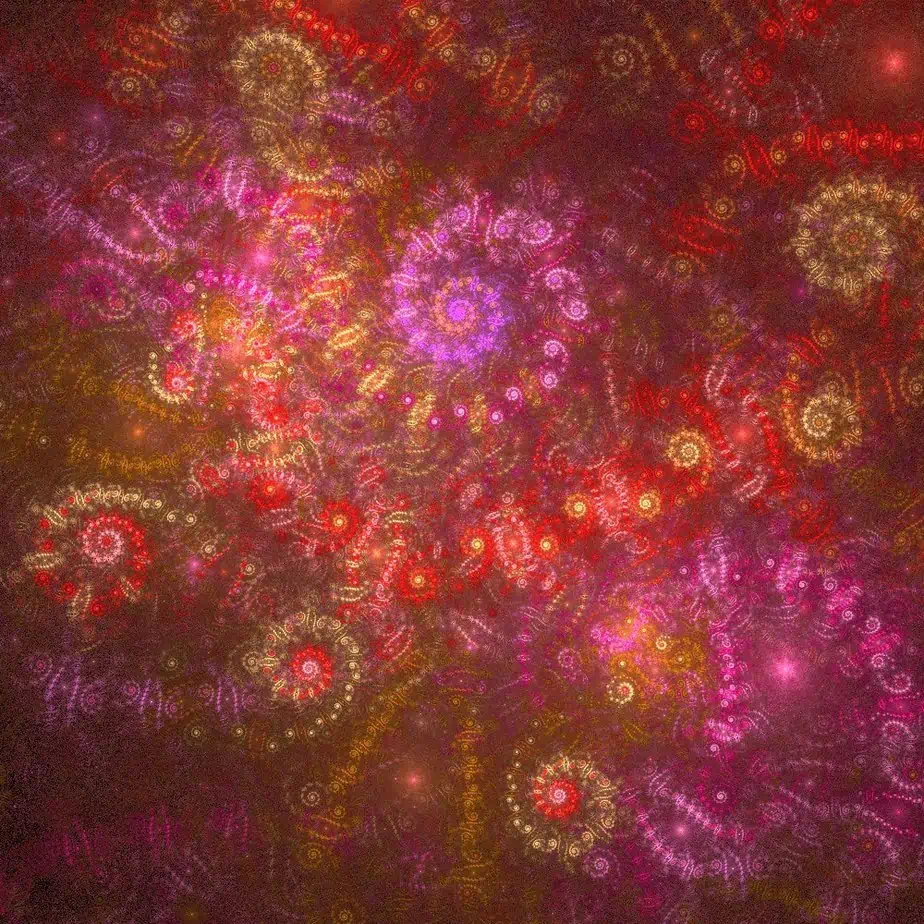
It is interesting to use linear as the motif that is spiralized. Since linear duplicates the flame, adjusted by the affine transform, and the flame is a spiral, this creates a spiral made from spirals, each of which is made from spirals, and so on. (The final transform is removed here.)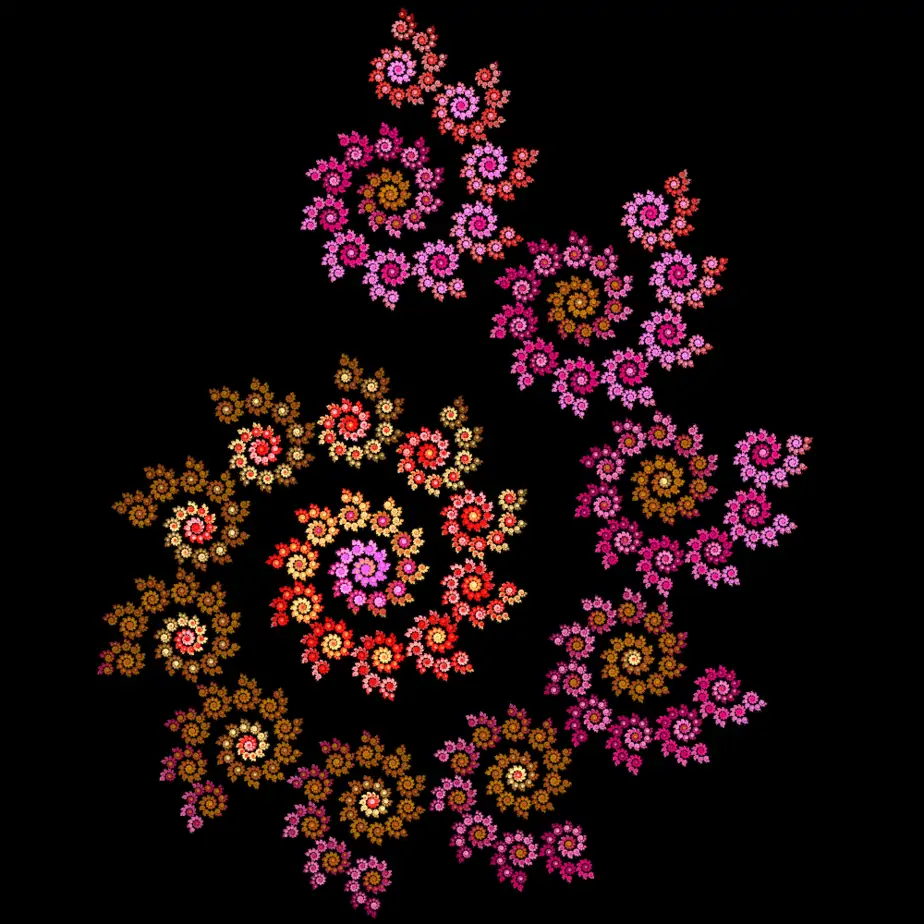
Linear can also make nice nebulae. Unlike many styles where we try to line things up exactly, nebulae flames take advantage of lots of overlapping transforms to create an amorphous but textured cloud. Start with a new flame and add a transform (keeping the default linear3D variation). Using the mouse, shrink the triangle a little, rotate it some random amount, and move it up and to the left. (In Move Triangles mode, selected by the second button from the top to the right of the flame preview, turn the scroll-wheel right to shrink the triangle, hold the right mouse button and move right or left to rotate it, then hold the left mouse button and move up and left to move it.)
Add another transform (again keeping the default linear3D variation). Set the color to 0.333. Then shrink the triangle a little, rotate it, and move it up and to the right. Add a third transform, set the color to 0.666, shrink and rotate it, and move it down and left. Finally, add a fourth transform, set the color to 1, shrink and rotate it, and move it down and right. Don’t shrink the transforms too much start with, but rotate and move them freely just to get a starting point. Then pick one of the transforms and shrink it some more, which will add texture to the nebula. Don’t shrink it too much or there will be too much texture; the proper amount is a matter of personal taste.
Find a gradient that looks nice and zoom in or out to get a good size. Then click the Render image button (bottom botton to the right of the preview) to get a good preview. Then go to the Coloring tab. The Brightness usually needs to be increased. Try different Gamma values to see the effect. Low values (like 3 or 4) tend to enhance the nebula’s inner glow; high values (12 or even higher) tend to flatten it; intermediate values (7 or 8) give a balance. But the effect depends a lot on the gradient, so be sure to revisit the coloring values after changing the gradient.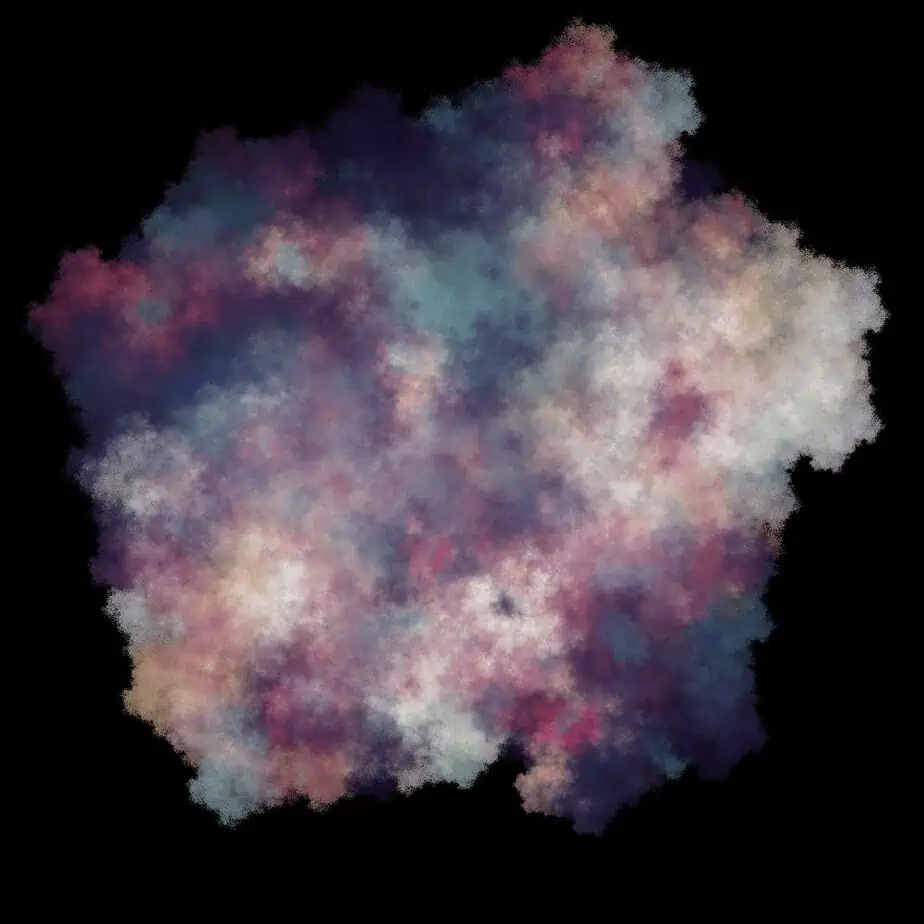
Many of the JWildfire variations can be made to work like linear by setting the parameters to particular values. For example, curl with c1 and c2 both set to 0 is the same as linear. An interesting way of tweaking flames made from linear is to replace the linear with one of these variations, then modify the parameters slightly. This is very effective with nebulae; here one of the linears of the above nebula was replaced with curl and the parameters changed just a bit.
Of course, just because a variation doesn’t have a linear-equivalent setting doesn’t mean it won’t be interesting! Here is the first nebula with one of the variations replaced with erf. With the particular combination used here, it looks like a bunch of crystals. Gamma was reduced to enhance the effect and a background gradient was added.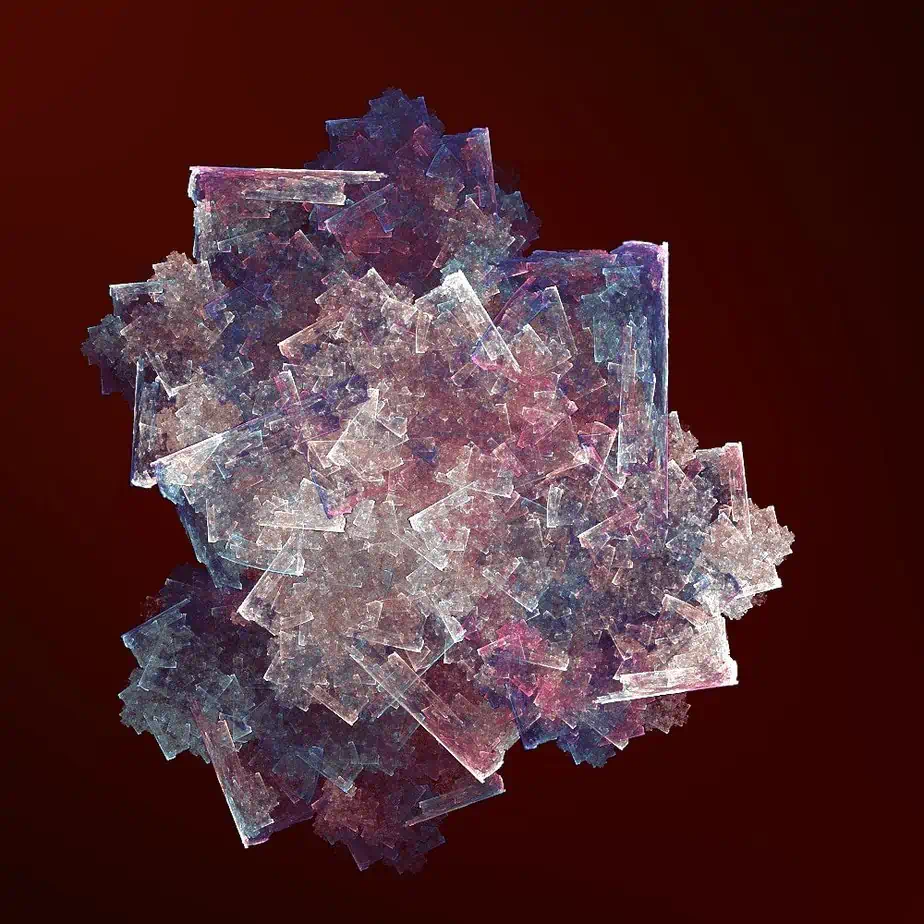
Obviously linear can do a lot more than we can cover here. It is a real workhorse variation. One final tip: linear3D can be used in a final transform to scale, rotate, and move the entire flame. This is normally done using the Camera settings, but that doesn’t work for a single layer in a multi-layer flame. The example above with the three twindragons was made with three layers, two of which were shifted horizontally using a final linear3D transform.
Parameters
| variation amount | Scale factor for the output. |
Resources
Here are some tutorials for the linear-based styles covered here. They are mostly for Apophysis, but can be replicated in JWildfire with a little experience.
Flame tiles:
Rep-tiles:
- Reptiles: Make it Easier! by C-91
- Square Tiling by dark-beam
- Linear Tile Tutorial by Tatasz
- Advanced Linear Tiles by Tatasz
Spirals:
- Creating a spiral spiral by UltraGnosis
- Spiral Tutorial by ClairJones
- Basics of Flame Fractals by Rick Sidwell
Nebulae:
Finally, you can start with one of the flames shown above by downloading the flame pack.


Thank you so much Rick, this is really building into an excellent in depth series of posts.